It’s been far too long since I’ve written a diy blog post. This time last year, I was blogging almost daily with various Halloween themed diy projects. I know, I’m lacking this year and for that I apologize. Hopefully this DIY Mini Top Hat will redeem me.
So last year for Halloween, our oldest girls went as Mario & Luigi. This year we’re getting to reuse one of those tutus for a sugar skull costume. We have already pieced together the outfit, the only thing missing is some head gear. Which brings me to today’s post for the DIY Mini Top Hat.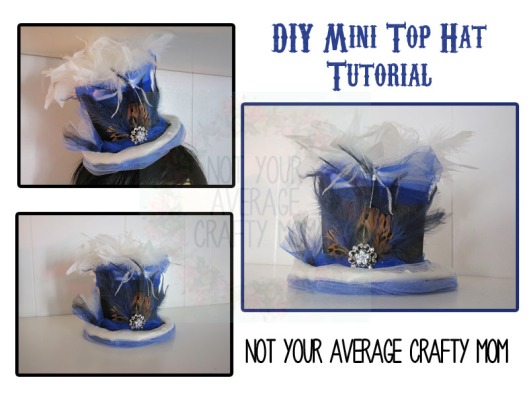
I used this video as inspiration and if you’re like me, you do better to watch a tutorial rather than read one so I wanted to be sure to include it in this post to help you out and also to give credit where credit is due. No one likes a thief! Let’s get started!
Materials:
- Cardstock
- Cardboard
- Ruler
- Scissors
- Hot glue gun and glue
- Tape
- Sharpie
- Fabric
- Ribbon
- Felt
- Hair clips
- Embellishments (feathers, rhinestones, tulle, lace)
I almost never gather all my supplies ahead of time because I usually don’t follow a tutorial step by step, I just kinda wing it. This time was no different, I just gathered things as I thought I needed them. Luckily for you guys I made a list as I used things so you’d know what I actually did use for my version of this project.
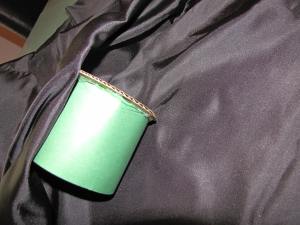
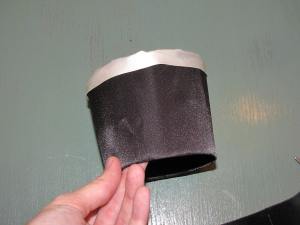
Step 1: cut your card stock so that it is 3 inches tall and 11 inches long. Once you have your strip of card stock, hot glue the ends together to make a cylinder. After I glued my ends together, I added some tape on the inside and the outside to make sure it was secure.
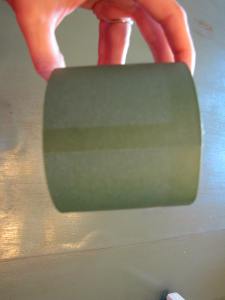 3in x 11in card stock strip glued together.
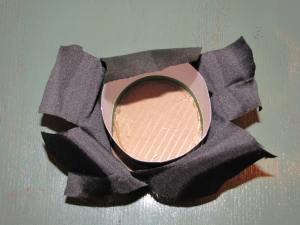
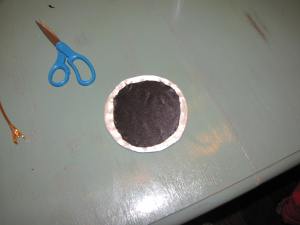
Step 2: Cut a circle out of your cardboard that is slightly larger than the cylinder. I used a roll of painters tape as a guide to create a perfect circle. I traced it using sharpie and then used my scissors to cut it out.
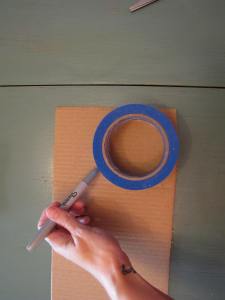
Trace and cut a circle out of cardboard.
Step 3: Add a lot of hot glue around the edge of your cylinder and adhere the two pieces together. Once you have the cylinder and the cardboard circle attached, add another ring of hot glue around the outside edge of the cylinder to make sure it is secure.
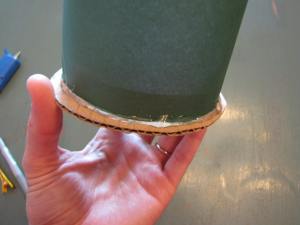
Glue your cylinder and your circle together with two layers of glue
Step 4: Once you have the base for the top of your hat, you need to cover it with your fabric. I did exactly what the youtube video suggested and glue along the edge of my cardboard circle and went with the natural roll pattern. I glued a small section, then rolled it onto the fabric and continue this process all the way around. Once the base was covered, I trimmed off the excess fabric from the sides and glued along the edge to make sure it was secure. Then I trimmed the excess fabric along the cardboard circle edge, trim that pretty close to the edge. Lastly, trim the fabric from the open end of the hat but leave a few inches. You end up tucking the excess inside the hat so don’t cut it too short.
Follow the natural roll pattern of the base as you glue the fabric down.
Step 5: Cut slits in the fabric along the open end of the hat. You do this to make it easier to tuck it inside. I cut mine about 5 times, you end up with something resembling a flower. Once you have those cuts made, glue the ends down inside your hat cylinder. Make sure as you are gluing that you pull the fabric tight so that it is nice and smooth on the outside. Once your sides are covered, cut a circle out of the fabric to glue to the top of your hat. Try to get it as close to the same size as possible. After you do this your top and sides should all be covered leaving only the opening at the bottom exposed.
Cut slits in the fabric to create a flower. Then glue these strips down inside the cylinder.
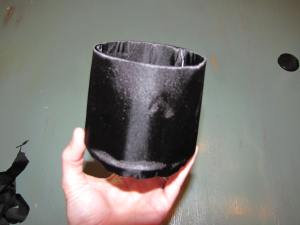
This is what your cylinder will look like once it is covered in fabric.
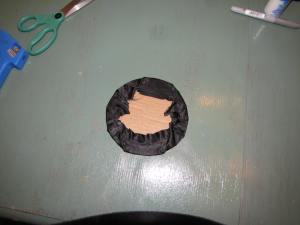
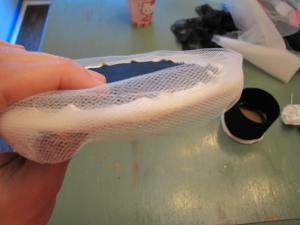
Step 6: Now you need to make the brim of your hat. The inspiration video uses wire for this step but since I didn’t have any, I used cardboard instead. I used a glass bowl that was a little larger than my cylinder as a tracing guide. Once I had my circle drawn on the cardboard, I used my scissors to cut it out.

Cut the brim of your hat out of cardboard. Make sure it is larger than your previous cardboard circle.
Step 7: Now that you have your brim cut out you have to cover it with fabric. I left the pieces a little long and trimmed them after I glued the edge down. Make sure you pull your fabric tight and tuck it as you glue that way the top side is nice and smooth. Once you have the top side finished, flip your circle and cut out a piece of fabric that fits just a little inside the outer edge and glue that down. This will be the underside of your hat so don’t worry if it looks a little messy.
Cover both sides of your larger circle, make sure your top side fabric is smooth.
Step 8: Now on this next step, I improvised and wasn’t really all that happy with the results. The inspiration video uses bias tape to trim the edges of the larger cardboard circle and the edge of the top of the hat. I didn’t have any bias tape so I used 7/8in ribbon instead. I felt like my edging looked sloppy so I recommend using the video method instead or maybe you’re better at gluing ribbon on a circular object than I am and yours will look great anyway. Either way, cover both the edge of your brim circle as well as the top edge of your hat in either bias tape or ribbon, whichever you choose.
Use ribbon or bias tape to trim your top edge of the hat.
Use ribbon or bias tape to trim the edge of your brim piece. As you can see my edging looked terrible which is why I decided to cover it up in the next step.
Step 9: Once you have the two pieces of the hat covered and edged, you’re ready to put them together. Now since my edging looked terrible, I decided to cover the brim edge with tulle to try and hide the sloppiness. I also added a huge feather cluster to the top of the hat to hide the edging there as well. If your edging looks good you can skip this step.
I used tulle to cover my terrible edging skills.
Step 10: In the video, she uses a long piece of lace and ties the hat on her head. Since this is for my 10 year old who will no doubt be wired to the gills with sugar, I decided to use two alligator clips instead. I cut a piece of felt and glued it to the underside of my brim piece and then glued the alligator clips down using a second piece of felt to sandwich between the clips and the bottom felt piece.
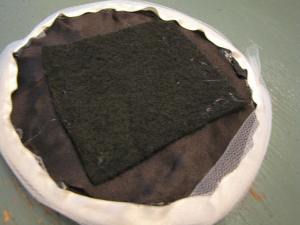
Glue down a large piece of felt to use as the base for your clips
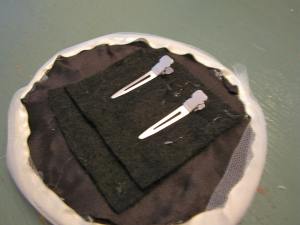
Glue down the clips using a second piece of smaller felt to sandwich between the clips and the larger felt piece.
Step 11: After I added my clips, I adhered my two pieces of the hat together. I put a ring of glue along the inside of the opening at the bottom of my cylinder. Once I had the glue in place, I pressed it down onto my brim piece. Make sure before you glue that you have the top of your brim piece facing up. Once the two pieces are together, add another ring of glue for extra security. I ended up covering the second ring of glue with tulle but you could use ribbon or lace like what is shown in the video. I forgot to take a picture of this step apparently but hopefully you’ll be able to figure it out.
Step 12: Now that you’ve got all the practical parts put together you can embellish the heck out of it. That’s what I did anyway. I added layers upon layers of tulle around the edges and also the underside to hide the clips. I added three feathers and a jewel to the front of the hat. I also added that large feather cluster I mentioned earlier. Then I made some little tulle puffs, for lack of a better word, to cover the seam in the back and side.
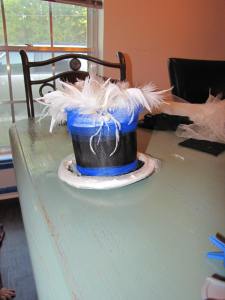
Here’s my hat after I’ve glued the pieces together and started embellishing.
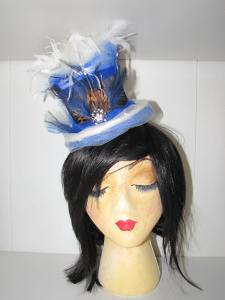
Here’s the finished product on my lovely fake head.
I have to say that I am pleased with the end result. I was very discouraged by the tacky edging job but once I committed to making it better, it worked out for the best. Stay tuned for pictures of the complete sugar skull costume after Halloween!
Spread the love by sharing, liking, or commenting on this post! Don’t forget to follow me on Facebook & Pinterest.


